To-do list: Create your tasks in Halaxy
You can now create tasks in Halaxy, and of course, they are smarter and more efficient than your usual stick notes. In Halaxy, tasks can be linked to appointments, cases notes, and invoices!


Is there's anything more satisfying than ticking things off your to-do list?
Creating and completing tasks not only feels good but it helps you manage and save time to focus on what really matters: treating patients.
That's why you can now create tasks in Halaxy, and of course, they are smarter and more efficient than your usual sticky notes. In Halaxy, tasks can be linked to appointments, cases notes, and even invoices!
Because to-do lists are great - here's a list of everything you need to know about the new tasks feature (feel free to mentally tick them off as you read it):
✅ There are two ways you can create and manage your tasks in Halaxy.
✅ You can manage and create tasks on the Tasks page (Schedule tab).
✅ Or add tasks directly to your appointments, case notes, and invoices.
✅ Simply look for the Tasks icon - then click and start creating your tasks.
✅ You can assign tasks to other practitioners in your practice.
✅ You can also add priority (low, medium or high), date/time and comments.
✅ For tasks you use often, you can create preset tasks.
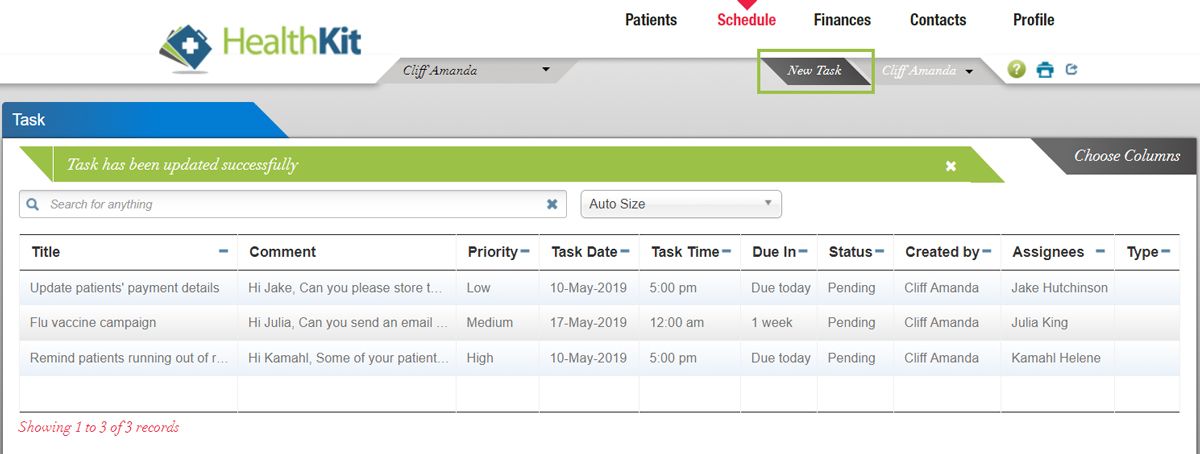
✅ If you'd like to see all your tasks, go back to the Tasks page.
✅ On the Tasks page you can see all tasks, who they have been assigned to, and their status (pending, completed or overdue).
✅ That's it! Keep reading to learn how to create your tasks in Halaxy.
Creating and managing your tasks in Halaxy
There are two ways you can create and manage your tasks in Halaxy, from your Tasks page or directly in the appointment, case note or invoice you'd like to add tasks.
Tasks page
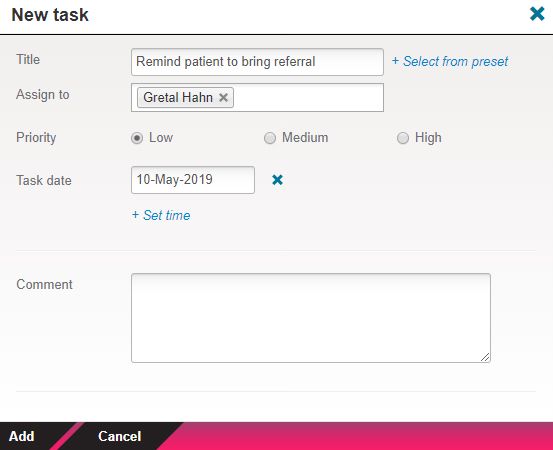
To manage and create tasks on your Tasks page, follow the steps below:
- Go to Schedule, then click on Tasks;

2. To create a new task, click on the New Task button;
3. Add a title to the task or select one from preset (read below to learn how to create a preset task);
4. Assign the task to a user in your practice;
5. Add priority, date/time, comments and save.
As you can see below, the Tasks page lists all the tasks you've created, their due date/time, assignees and status.
Tasks linked to appointments, case notes and invoices
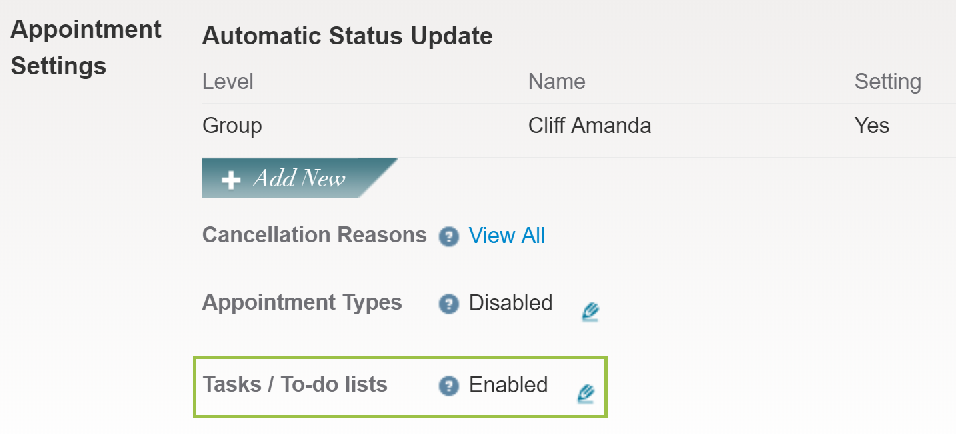
If you'd like to have the option to add tasks to appointments, case notes and invoices, make sure you enable his feature in your Settings page:
- Go to Profile > Settings;
- Under Appointment Settings, click on the pencil icon next to Tasks/To-do lists.
- Select Enabled and save.
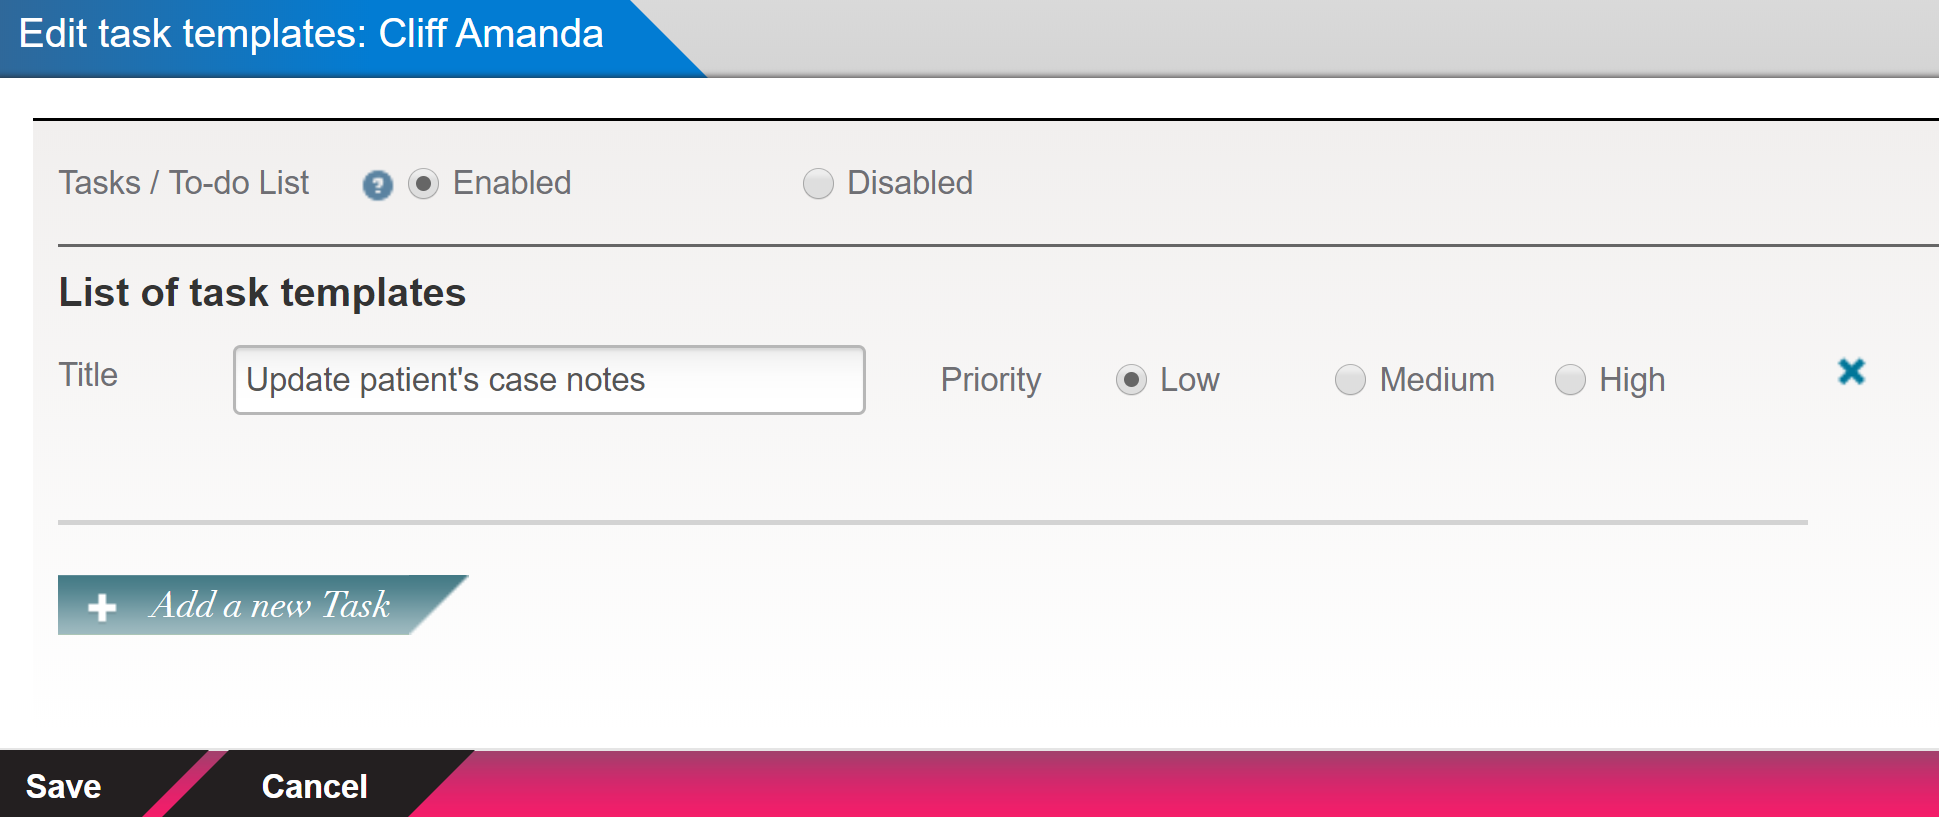
Creating preset tasks
4. You also have the option to create your preset tasks in the Tasks/To-do lists settings page before saving.
Creating tasks linked to appointments, case notes and invoices
Now that you've enabled the Tasks feature, you can create tasks specifically for an appointment, case note or invoice - simply follow the steps below:
- First step is to locate the Tasks icon on the appointment, case note or invoice page, here's where you can find it:
Appointment:
Case note:
Invoice:
2. All you need to do is click on the Tasks icon and create the task like described above.