Integrate your Halaxy and QuickBooks accounts
Your Halaxy includes all the essential features you need to run your practice, and it also integrates with your favourite partners including Xero, Reckon and now: QuickBooks!

Your Halaxy includes all the essential features you need to run your practice, and it also integrates with your favourite accounting software products including Xero, Reckon and now: QuickBooks!
Great news, right? Halaxy now integrates directly with QuickBooks, so all invoices and expenses you create in Halaxy are automatically replicated in your QuickBooks account, saving you time and effort.
Keep reading to learn how you can integrate your Halaxy with QuickBooks and make the most out of it!
Halaxy for your accounting needs
You can track your practice's financial health quickly and easily with Halaxy, as it automatically tracks the financial statements you need, including income, expenses, and profit and loss, as well as BAS.
Many practices can rely solely on Halaxy for their accounting needs, and you can also integrate Halaxy with your Xero and Reckon accounts, as well as with your QuickBooks account!
Before syncing your accounts, go to your QuickBooks account first
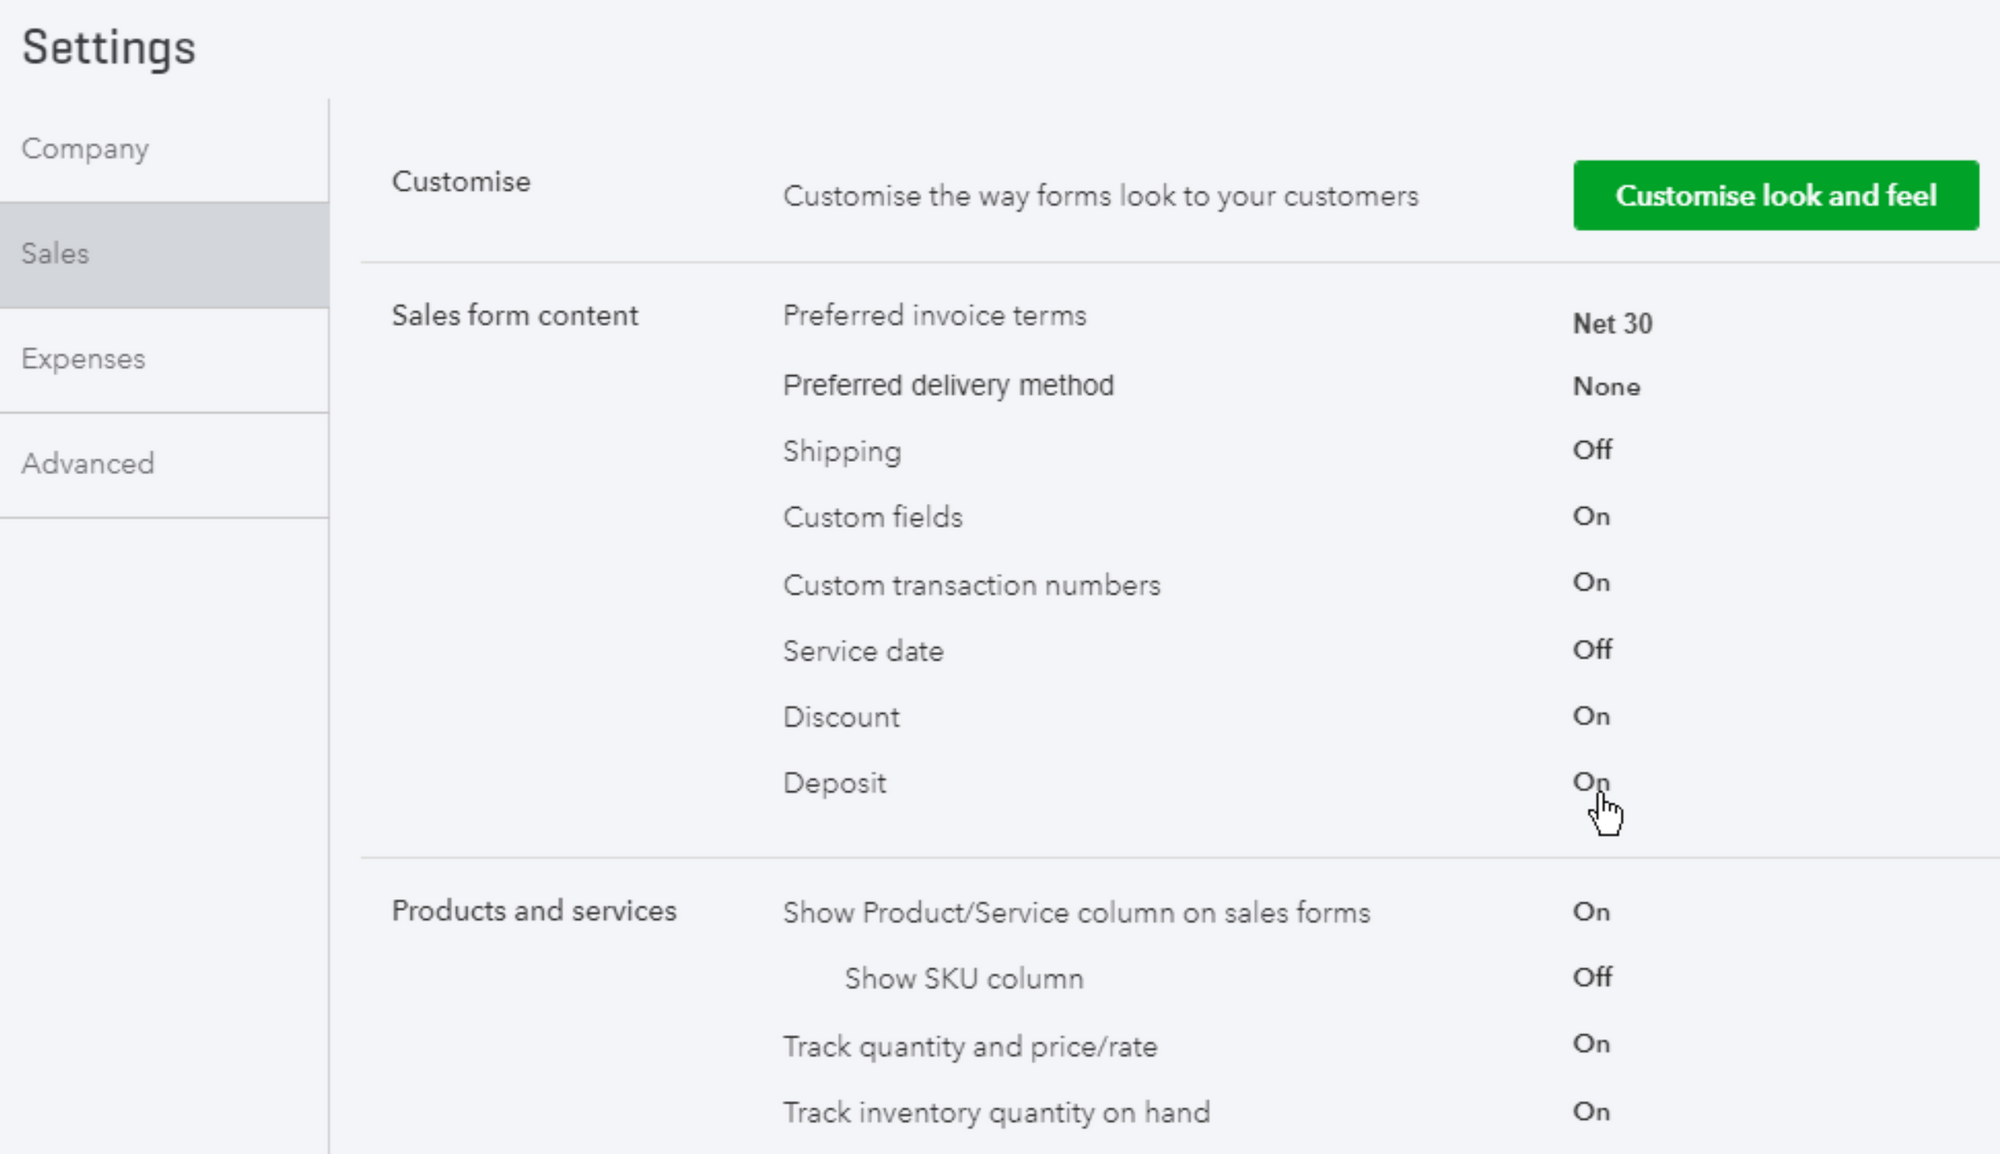
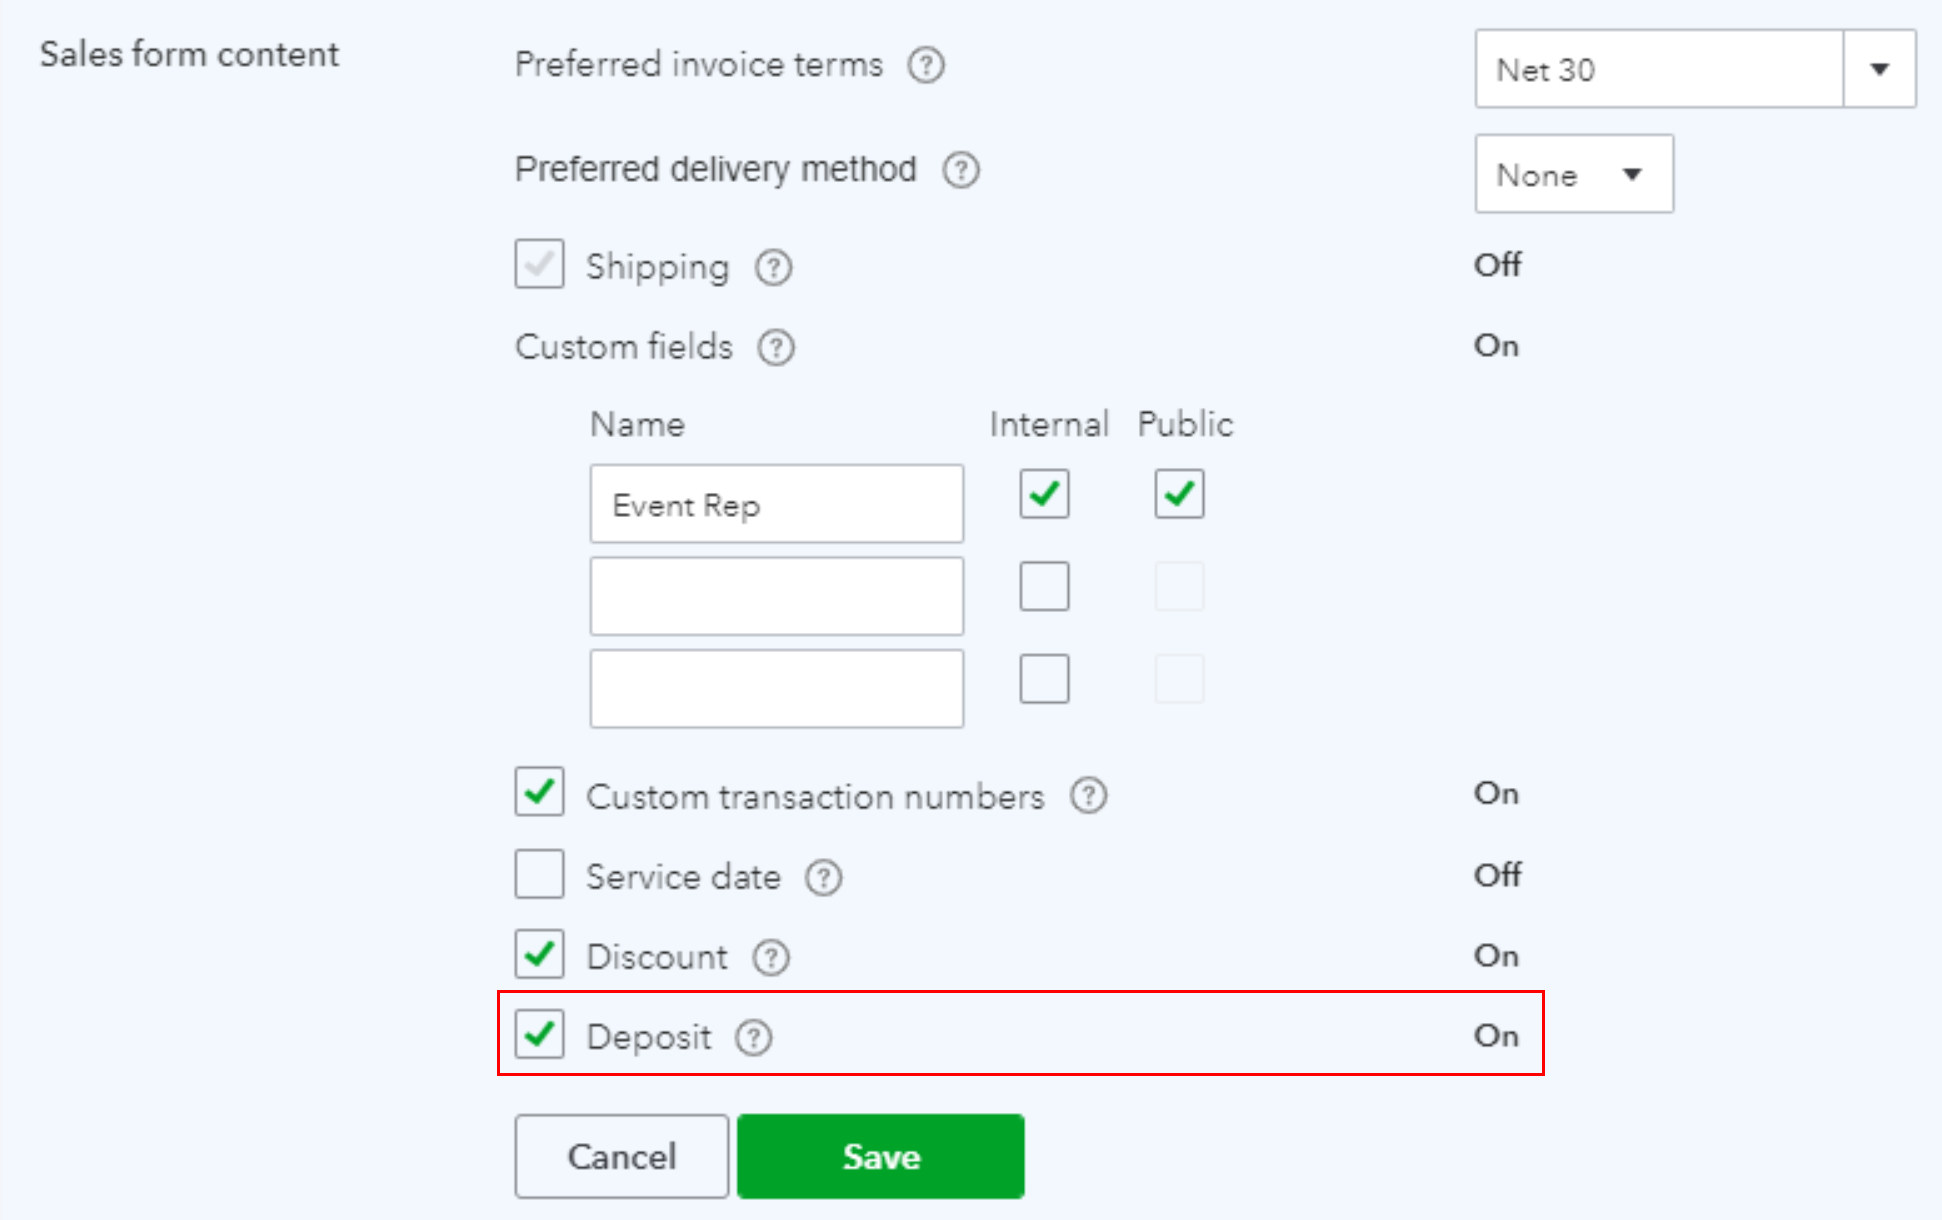
Before you sync you Halaxy and QuickBooks accounts, you need to go to your QuickBooks account and make sure you have ticked the deposits option. Here's how you do it:
- Go to your QuickBooks menu on the right top hand corner and click on the cogwheel icon;
- Click on Company settings > Sales;
- Click on Deposit:
4. Then tick the Deposit box and save.
Log in to your Halaxy and follow the instructions below.
Halaxy and QuickBooks integration
When you integrate your Halaxy with QuickBooks, all the invoices and expenses you create in Halaxy are automatically replicated in your QuickBooks account.
Halaxy also allows you to sync your QuickBooks account to individual practitioners, different locations and across large group practices - so you can direct invoices, payments, and expenses created in Halaxy to different accounts in QuickBooks.
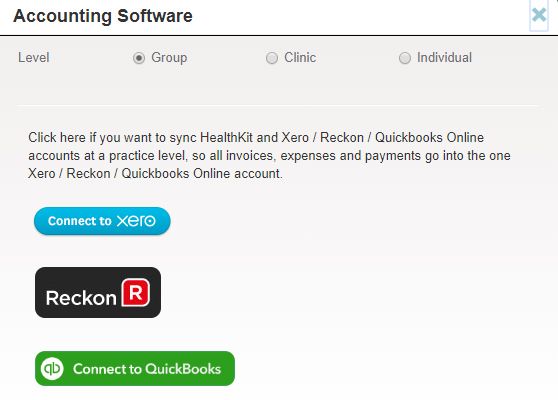
To integrate your Halaxy and QuickBooks accounts, follow the steps below:
- Go to Profile > Payments;
- Under Accounting, click on Add New;
- Select Group, Clinic or Individual, then click on Connect to QuickBooks;
4. Login to your QuickBooks account and follow the steps.
After the accounts have been synced, you'll be redirected back to your Halaxy account.